Elevate Your Halloween Haunt with DIY Gummy Worm Ice Cubes for the Ultimate Punch
Halloween is a time for spooky delights, eerie decorations, and, most importantly, deliciously fun treats! While candy might be king, no Halloween celebration is complete without a show-stopping beverage. And when it comes to captivating the imaginations of kids and adults alike, nothing quite beats a vibrant, bubbling concoction brimming with creepy-crawly surprises. We're talking about the legendary Spooky Gummy Worm Punch: The Ultimate Halloween Party Drink, specifically enhanced by our fantastic DIY Gummy Worm Ice Cubes.
Forget bland, diluted drinks! This guide will empower you to craft the perfect halloween gummy worm punch that’s as visually stunning as it is refreshing. The secret? Homemade ice cubes, each encapsulating a wiggly gummy worm, slowly releasing its vibrant color and adding a playful, chilling touch without ever watering down the fabulous flavor of your punch. It's an effortless trick that transforms a simple drink into an unforgettable, spooky spectacle. Let's dive into making these incredible ice cubes and then assembling your best-ever Halloween punch.
The Star of the Show: Crafting Your DIY Gummy Worm Ice Cubes
The magic of this halloween gummy worm punch truly begins with its unique ice cubes. These aren't just any ice cubes; they're tiny, edible terrariums, each holding a colorful gummy worm suspended in a block of frozen fruit punch. This simple step elevates the entire drink, providing both a visual wow factor and a burst of flavor as the ice slowly melts.
Why Gummy Worm Ice Cubes Are a Must-Have
- No Dilution Drama: Using frozen punch instead of plain water means your drink stays flavorful, not watery, as the ice melts.
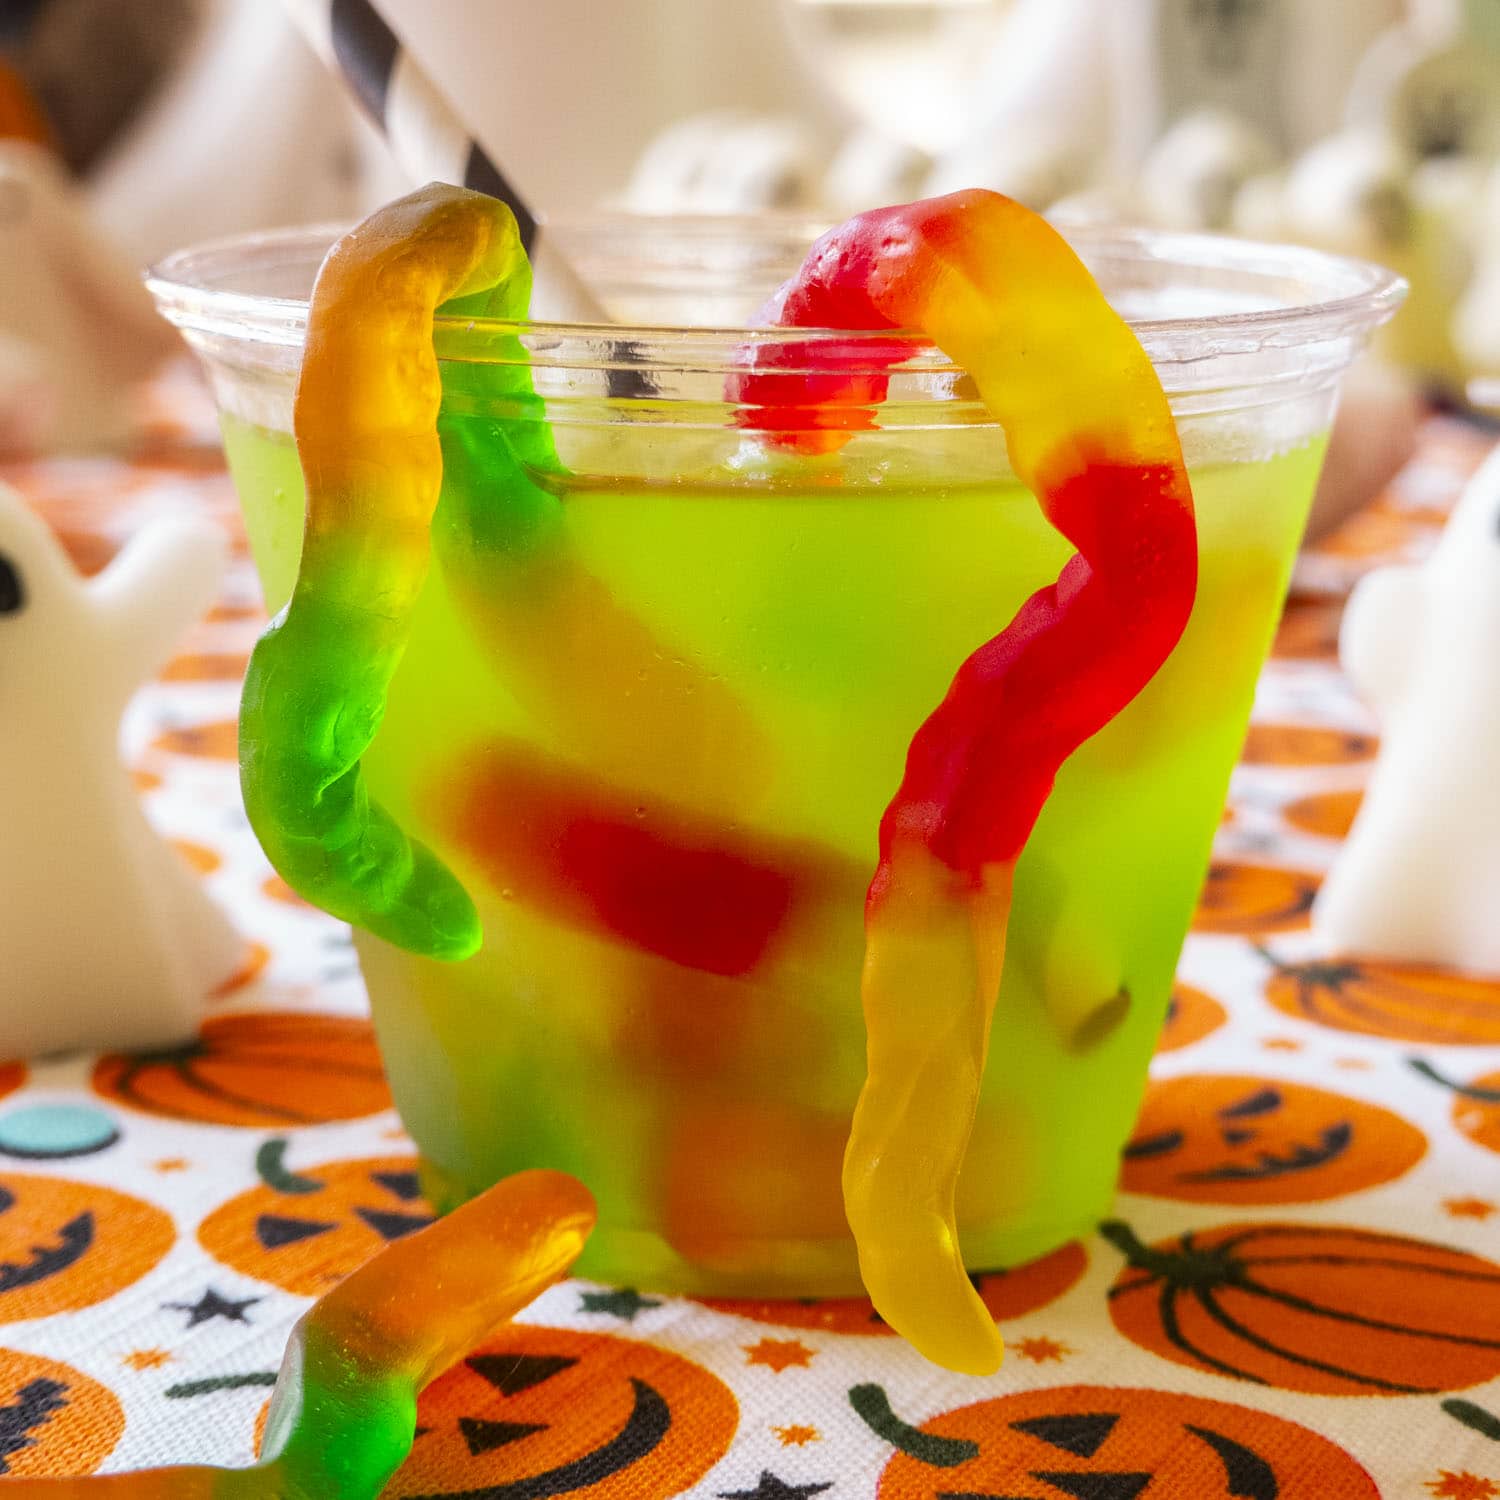
- Creepy-Crawly Visual Appeal: The worms encased in ice are undeniably eye-catching and perfectly align with the Halloween theme, creating a truly chillingly cool effect.
- Interactive Fun: As the ice melts, the worms are "released," adding an element of surprise and delight for guests.
- Flavor Infusion: The frozen fruit punch contributes to the overall taste profile of your punch, creating a harmonious blend.
What You'll Need for Your Gummy Worm Ice Cubes:
- Gummy Worms: Traditional green/yellow and red/yellow worms are classics, but feel free to experiment with other colors or even gummy spiders or eyeballs for different spooky effects.
- Green Fruit Punch: Brands like Hawaiian Punch are popular choices for their vibrant color and sweet taste. This will be the base of your ice cubes.
- Ice Cube Trays: Standard trays work perfectly, but consider silicone trays for easier removal or novelty Halloween-shaped trays for extra flair.
Step-by-Step Guide to Gummy Worm Ice Cubes:
- Position Your Worms: Place 1-2 gummy worms into each compartment of your ice cube tray. The number depends on the size of your worms and tray compartments. Try to lay them flat or curled into interesting positions for the best visual effect.
- Fill with Punch: Carefully pour the green fruit punch into each tray compartment, covering the gummy worms completely.
- Freeze to Perfection: Transfer the filled ice cube trays to your freezer. For best results, allow them to freeze for at least 5 hours, but freezing overnight is ideal to ensure they are rock-solid and won't melt too quickly in your punch.
- Pop and Prepare: Once fully frozen, gently pop the gummy worm ice cubes out of their trays. You can store them in an airtight container in the freezer until your party day.
Pro Tip: For an extra layer of flavor and color, consider freezing a few ice cubes with different colored fruit juices (like grape or cranberry) and a gummy worm to add variety to your punch bowl.
Crafting the Ultimate Halloween Gummy Worm Punch
Now that your spectacular DIY gummy worm ice cubes are ready, it's time to assemble the main event: your incredibly simple yet undeniably impressive halloween gummy worm punch. This recipe is wonderfully flexible and forgiving, ensuring success even for the most novice hosts.
Key Ingredients for Your Punch:
You'll be delighted by how few ingredients are needed to create such a memorable drink. For a classic, vibrant Easy 3-Ingredient Halloween Gummy Worm Punch for Kids, you'll need:
- Green Fruit Punch: The same vibrant green fruit punch used for your ice cubes. This provides the primary base color and flavor.
- Lemon/Lime Soda: A chilled carbonated beverage like Sprite, 7UP, or any generic lemon-lime soda. The fizz adds effervescence and a delightful citrusy kick.
- Your DIY Gummy Worm Ice Cubes: The stars you just prepared!
- Optional Garnish: Extra gummy worms (of course!), perhaps some plastic spiders, or fresh lime slices for an added touch.
Assembly Instructions for a Large Batch (Punch Bowl Style):
For a party, a punch bowl is ideal for showcasing your spooky creation:
- Chill Your Ingredients: Ensure both your green fruit punch and lemon/lime soda are thoroughly chilled before mixing. This helps keep the punch cold longer and preserves the soda's fizz. You can even refrigerate your carbonated beverages the morning of the party.
- Combine Liquids: In a large punch bowl, gently combine equal parts (or to taste) of the green fruit punch and the lemon/lime soda. Stir minimally to retain the fizz. A good starting point is a 1:1 ratio.
- Add the Wormy Ice: Just before serving, carefully add a generous amount of your DIY Gummy Worm Ice Cubes to the punch bowl. Watch as the "worms" begin to float and peek out of the green liquid!
- Garnish for Impact: Scatter additional gummy worms directly into the punch bowl or drape them artfully around the rim of the bowl. For individual glasses, hook a gummy worm over the edge of each glass for an extra creepy touch.
Serving Individual Glasses:
If you're serving individual portions, perhaps for a smaller gathering or to customize each drink:
- Place 2-3 DIY Gummy Worm Ice Cubes into each glass.
- Fill the glass about halfway with chilled green fruit punch.
- Top off the remaining half with chilled lemon/lime soda.
- Garnish with an extra gummy worm crawling on the rim of the glass.
Serve immediately and watch your guests delight in this spooky, delicious treat!
Beyond the Basics: Tips for a Hauntingly Good Halloween Punch
While the core recipe for this halloween gummy worm punch is beautifully simple, there are numerous ways to customize and enhance it, making your party truly unforgettable.
Make-Ahead Magic and Planning:
- Ice Cube Longevity: Your DIY gummy worm ice cubes can be made up to a week in advance and stored in a freezer-safe bag or container, making party day prep a breeze.
- Chilling is Key: Always ensure all liquid ingredients are thoroughly chilled before mixing. This maintains the punch's refreshing temperature and the soda's carbonation.
- Ice Ring Alternative: If you have a Bundt pan or an ice ring mold, consider creating a giant "gummy worm ice ring." Simply arrange gummy worms in the bottom of the greased pan, fill with green fruit punch, and freeze. This massive ice ring will keep your punch cold for longer without diluting it. Just ensure the pan fits your punch bowl before freezing!
Flavorful Twists and Variations:
- Citrus Zing: For a less sweet and more refreshing punch, squeeze in a splash of fresh lime juice. It brightens the flavor profile beautifully.
- Different Juices: While green fruit punch is classic for its spooky hue, don't shy away from experimenting! Pineapple juice, orange juice, or even a mix of juices can create different flavor bases and colors. Just ensure the color still fits your desired aesthetic.
- Ginger Ale Swap: If you prefer a less sweet soda, ginger ale can be a fantastic substitute for lemon-lime soda, adding a subtle spicy note.
Presentation Pointers for Maximum Impact:
- Spooky Glassware: Serve your punch in themed glasses. Think plastic cauldrons, laboratory beakers, or glasses with Halloween decals.
- Punch Bowl Decor: Arrange plastic spiders, cobwebs, or even small, battery-operated LED lights around your punch bowl for extra ambiance.
- Dry Ice Effect (Use with Caution!): For a truly dramatic, smoky effect, place a small chunk of food-grade dry ice in a separate, heat-resistant bowl *under* your punch bowl. The "fog" will creep around your table. NEVER allow dry ice to come into direct contact with the punch or guests. Ensure proper ventilation and handling with gloves.
Safety Considerations:
- Choking Hazard: While fun, gummy worms can be a choking hazard for very young children. Always supervise little ones when they are enjoying drinks with gummy candies.
- Allergies: Be mindful of any allergies your guests might have, especially concerning ingredients in the fruit punch or gummy candies.
Conclusion: Your Easiest & Best Halloween Punch Awaits!
With these DIY Gummy Worm Ice Cubes as your foundation, crafting the perfect halloween gummy worm punch has never been easier or more fun. This simple recipe delivers an impressive, delicious, and highly customizable beverage that will be the talk of your Halloween party. From the moment guests glimpse those eerie worms suspended in ice to the refreshing fizz of each sip, this punch promises a delightful experience for all ages.
So, gather your ingredients, unleash your inner mad scientist, and get ready to stir up some spooky magic. Your best Halloween punch yet is just an ice cube tray away!
